Saturday, March 20, 2010

How To: Alter a Book, part one

This is a repost of a tutorial I posted on my personal blog in late 2008...

Altering a boardbook - preparing the surface...

You will need:
  • A board book (the kind intended to be chewed on by toddlers)
  • Sandpaper (maybe)
  • A Sharp craft knife
  • A cutting mat
  • A bone folder (or a popsicle stick or old teaspoon)
  • Paper for collage (scrapbooking paper, wrapping paper, pages torn out of other books...)
  • A Gluestick (or découpage gel - this is generally better, but a bit messy. I used a gluestick for this project because I wanted to be able to draw on the paper after and it's easier to keep track of where the glue from the gluestick's going...)
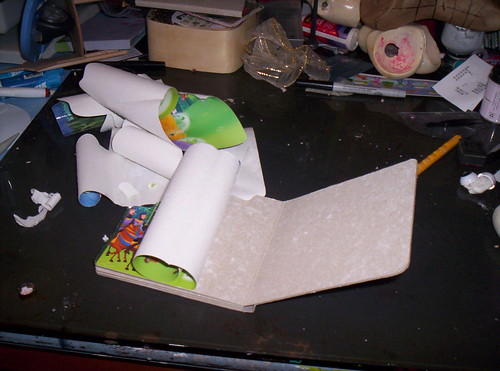
Start by carefully peeling off the glossy printed top layer of paper. Try to remove as little of the bookboard as possible. You could sand the gloss off, but I find the paper-peeling far more satisfying.

000_1606

The naked book and a selection of papers...

000_1700

A note before starting to apply the papers - I am an extremely messy worker, and like to cover the cover of the book last, so that I don't get glue all over it.
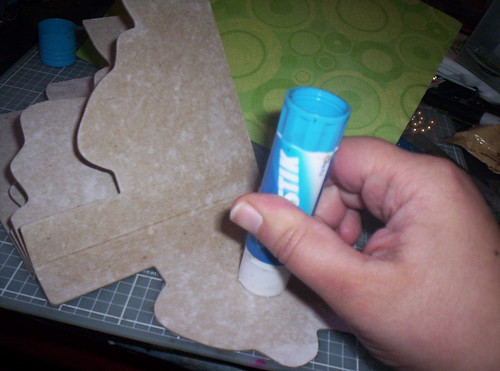
Apply copious amounts of gluestick - make sure you cover the entire surface with glue - otherwise you get air pockets and/or the paper may peel off.
000_1701

NOTE: If you are using découpage gel - paper expands when it's wet, so get the entire piece wet and it will all expand at the same rate - then when you paste it down it's easier to avoid wrinkles.

Place the paper over top of your page and burnish it. Start at the centre of the page and (pushing down hard) work your way to the edges. I often have a little bit of glue ooze out - try not to get any on your burnishing tool. Skip this step if you are using gel.
You can use a fancy-schmancy bone folder for this, but as mine was covered in polymer clay at the time, I used a clean popsicle stick.

000_1702


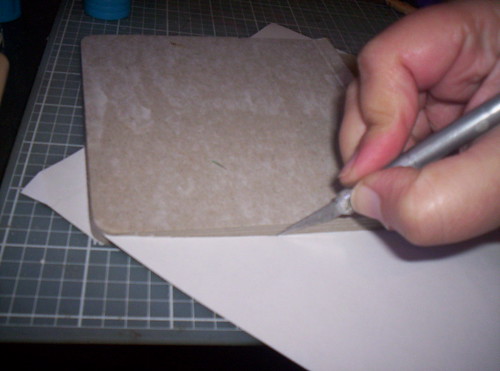
Wait for your glue to dry then flip the book over and trim the excess paper from the back with a SHARP blade.
(A sharp knife is a safe knife)
000_1703

I sometimes hang the book over the edge of the table to get to the fiddly bits near the spine.

000_1704

The first covered page....
000_1705

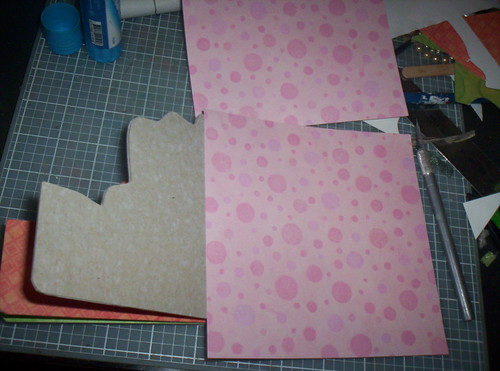
If the paper you want to use is smaller than the page, use two pieces. Glue one down as usual, but don't trim the paper yet.
000_1706

Tear a thin strip off one edge of the second piece. If you don't want any white (the paper's core) showing, make sure that you pull the part of the paper that you want to use towards you (if you do want the white tear to show, pull it away from you).
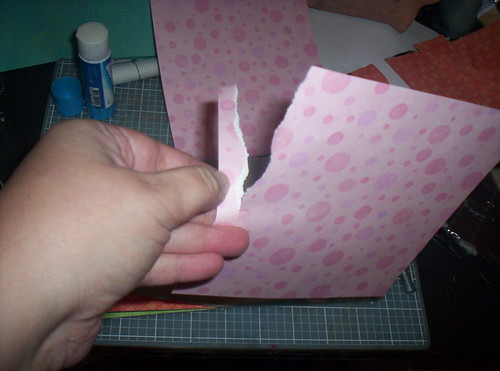
000_1707

Apply lots of glue and overlap the torn edge.
You can do this with lots of bits of paper if you want your base to be all collagey and stuff...
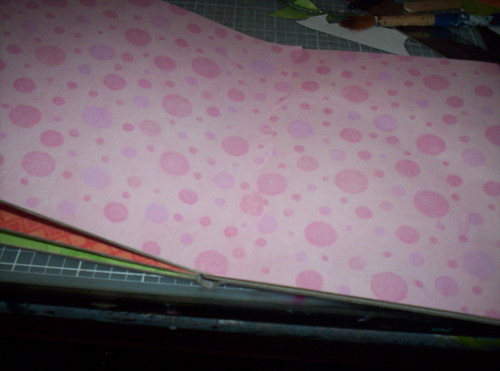
000_1709

The re-covered book, ready for scribbling in....
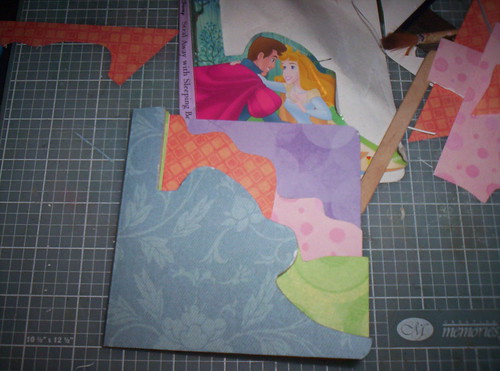
000_1711
...and Princess Aurora? The story in this boardbook was terrible. I felt no guilt at all in tearing it up...


XoX

Alana
Monday, February 15, 2010

Visual Diaries, Journaling Creativity, Getting it on paper...


Sketch books...
Journaling...
Visual dairies...

Every article I've come across regarding creativity bang on about these things being essential.
And by large they're right.

In order to live a creative life you need to first let go of the notion that you can only create when the  muse' or 'inspiration' hits ("I can only draw when I'm inspired"). Don't wait for things to strike you; pick one thing each day and then write about it or do a drawing from it. In this way, you'll train yourself to look at the world with a creative eye.

But if you've never keep a dairy or sketchbook - how do you start?

Step One: find a book that you like.
You could use:
  • A pretty album designed specially for the purpose
  • A lined school exercise book
  • A spiral bound sketchbook
  • A novel with gessoed-over pages
  • A board book (peel off the laminated layer of paper)
  • Loose pages that you've bound together

The only prerequisite is that it should be something that you like the size of and that you are comfortable with.

Step two: Scribble all over one page...Draw, doodle, write the name of your one true love surrounded with hearts - whatever - but MARK that fresh, clean paper as soon as you can. Get it out of the way - make that perfect book imperfect.


I ALWAYS feel guilty when I do this; a blank book is a beautiful thing, full of potential. It could contain ANYTHING. How dare I sully it with my pathetic scribblings...?
This impulse not to draw all over it is Artists Block - the entire purpose of keeping a sketchbook is to help you break out of this type of thinking..
You are not obligated to create fantastic art inside a sketchbook - just as you don't have to show anyone your personal dairy.


Step three: If you THINK you can't draw (and that is a WHOLE other topic - and one I'm very passionate about...) but want to draw in your book - then DRAW IN YOUR BOOK.

If you feel that your appalling spelling means that you will never be able to write, but want to write in your book - then WRITE IN YOUR BOOK.

If you want to glue things in there - WHO CARES if cutting and pasting is something done in kindergarten - then GLUE STUFF IN YOUR BOOK.
  • Make notes
  • Write lists
  • Draw stars and circles and faces
  • Thumbprint doodles
  • Sketch your kitty
  • Ask a small child for a suggestion of what to draw - and draw the first thing they suggest!
  • Try writing some bad poetry!
  • Collect pictures of haircuts you'd like to try
  • Write your favorite quotes and illustrate them
  • GET A GLITTER PEN!
  • Write affirmations and goals
  • Compose letters to fairy tale characters
  • DRAW fairy tale characters
Basically, go nuts!

These books are meant to be records of your thoughts, of things that catch your eye, things you are trying to work out. My sketchbooks are eclectic, messy affairs - drawings interspersed with lists and diagrams for my day job. Watercolour paintings and Sharpie pen scratchings. Pencil studies and schematics for dolls. Character designs and Scrapbooking layout plans. Concepts for jewellery and balancing my budget. Pasted in print-outs of designs and toys that I love. No ryhme or reason to the order that these things appear in these books (but I'm working on that! Honest!).
A journal is for YOU! It is your rambling feelings on paper and whether those thoughts are drawn, written or cut'n'pasted from magazines does not matter. Just get them out.

---
Alana
xox

Saturday, January 16, 2010

Feb market has been postponed....

Hi everyone!

I'm afraid we have a sad announcement to make - the Love Handmade Feburary Market will be postponed. Both of us have had some unexpected major changes happen in our lives recently, which means we are unable to afford (at the moment) to give the market what it needs.

After reviewing feedback from our wonderful sellers so far, we have decided to look into another venue also. This break will give us the time we need in order to look into this further.

We are also looking into getting the Love Handmade "look" developed further to give it a more fresh and professional look.

This will not be the end of us and we are not going to dissapear!
Instead we are going to focus our time not only on developing and improving our market, but also supporting artists & crafters, featuring blogs, upcoming events and developing and expanding our newsletter.
So keep an eye on our blog and our facebook page and twitter for exciting updates in the arty and craft world, and make sure you sign up to our newsletter. It's going to be a goodie!!

---
Rhiannon & Alana
xxx

Saturday, January 9, 2010

Applications for Feb are OPEN!

As the title says, the time has arrived - applications are open for the first 2010 Love Handmade Craft Market =)
Applications will close on the 22nd Jan at 6pm so don't miss out!
Alana and I have been working really hard over christmas on new ideas and marketing which is exciting!

Love Handmade Craft Market
Saturday 13th Feb
10am to 1pm
The Rose Centre, Belmont (near Takapuna)


COMING SOON: There will be a link to the right to download the PDF flyer (you can click on the image now to get a .gif) for you to send around to friends and family, to post on your blog, to post at work, to post on Facebook - anywhere you can think of =)
---
Rhiannon
xxx

Sunday, January 3, 2010

Ah, Holiday time.

So much free time - but what to do with it?

Well, I tend to make stuff.

Here are a few links to patterns/tutorials that I have saved to my favourites list...

Click on the images to be taken to the applicable website...

A collection of easy-to-make paper toys - designed by Marilyn Scott-Waters - including instructions for these supercool Koi Kites!


The sweet "Child" cloth doll pattern, by Mary Tressler.

(A word of advice - If you've never made a cloth doll before - don't try doing the individual fingers in this pattern. Adapt the hand into a "mitten" shape instead. Much less infuriating, trust me.)


Assorted Free patterns (including Meri the Merbaby) at Dollmakers Journey. there are some very simple projects here - some may even be simple enough to distract the children...


And Art Jewelry magazine's website has some very cool projects and articles (and not all aimed at beginners - which I like)


Have a happy and safe holiday - and have lots of fun creating.
I know I will.

Alana
xox